Saturday, October 27, 2007

Bottom rails, vertical stab

Build hours: 262
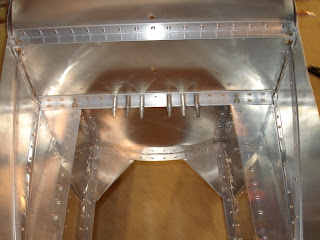
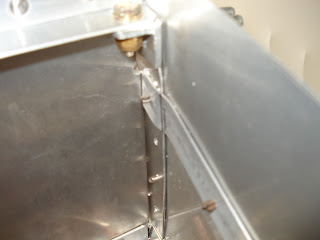
The bottom rails were drilled, deburred and riveted to the fuselage bottom. The area around the spar was left open until the actual spar bolt locations were drilled.

Many of the empennage parts had been precut in between other building task and were ready for forming. The obligatory particle board form blocks were cut, smoothed, rounded, etc and the rib were carefully formed. Of course, with the curved flanges, the parts came out of the forms with ripples in the flanges and curved like a banana :( It was finally time to use the shrinker. A few soft presses straightened the part and we drilled and clecoed the ribs to UCA and UCB.

Friday, October 26, 2007

"A" Bulkhead stiffeners

Build hours: 252
The "A" bulkhead stiffener was added. The bulkhead tabs were drilled, the stiffener clamped and then backdrilled 3/32". The holes were then drilled with a 1/8" drill instead of a #30 in preparation for dimpling. The holes were deburred and dimpled and then the stiffener was riveted on. The stiffener was placed so that 1/4" turn fasteners could be installed in the front edge in their streamlined position and #6 nutplates could be installed in the rear edge.

Monday, October 22, 2007

Engine compartment completed

Build hours: 244

Both engine compartments are riveted up and ready for the engine cover. The lower engine baffle and braces are under the skin for a smoother look. The nose cowl hole and slot is flanged and the engine cover will lay flush on the nose cowl ledge. The nose cowl will not be riveted until the engine can be test fit and the oil cooler baffle can be installed. Plan note:Our next step is to flush rivet every other hole on the side rails back to bulkhead "B" and add the angles to the bottom of the fuselage before retiring to some tail work!

Plan note:

We intended to flush rivet every other rivet on the siderails between bulkhead "A" and "B" per the plans. The plans do not mention the need to countersink the rail holes so that the skin can be dimpled for the flush rivets which would need to be done before installing the rail! (The catchall plan note is - prior building experience is required!) With only the rivets in the C to D skin needing removal, we could have accomplished the countersinking. However, a call to the factory suggested using the universal head rivets and then relieving the tank cover skin for those rivets. This is simpler and allows the entire rail to have a 1" rivet pattern showing.


Sunday, October 7, 2007

Engine compartment

Build hours: 230
Disassembled, deburred and reassembled both engine compartments. (The deburring fingers are now experiencing a minor numbness!) The front cowls need to be formed and the engine compartments will be ready for riveting! The next view of the engine compartment will be less prickly.

Saturday, October 6, 2007

Engine compartment

Build hours: 224
The front cowl needs a hole for the engine thingy to go through and a few air holes to keep the engine thingy cool. A hole is not complete without a flange so after some masterful routing and a mess of particle board dust in the shop these dies were created for flanging.


The first hole and slot in the test cowl was done by hand with the Morry stick method (labor intensive) and the last slot was made with the die with a few whacks from the deadblow.


Friday, October 5, 2007

Engine compartment

Build hours: 218
Job and scheduling interfered with the important things of life but we are back and moving on the engine compartment. The side braces were added to both UCs.

A joggle was added at the upper end to stop the skin from being pulled in at the firewall.

The cowls were formed and mounted along with the lower firewall braces and the the lower engine baffle. The lower baffle and the firewall braces were put under the skin to create a cleaner look around the engine compartment. The oil cooler baffle has been formed but will go in after the engine is fitted.